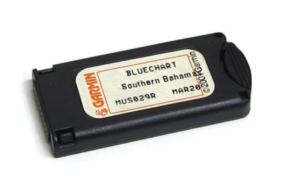
Fig.: Garmin BlueChart G1 Stick
Garmin used a proprietary nautical chart memory stick called BlueChart G1 for its older plotters. These sticks were available in sizes from 8 to 512 MB. The stick consisted of two memory modules with a 16-bit data interface, allowing data exchange with the plotter's electronics. Garmin initially offered sticks with read-only nautical charts. However, writable sticks were also available, allowing users to transfer their own charts using a USB card reader and the Windows software MapSource. Special drivers were required for MapSource to recognize the USB card reader; these drivers were only available for Windows XP and Windows Vista. Newer operating systems like Windows 7, Windows 10, and Windows 11 no longer support the older 32-bit drivers, requiring users to revert to one of these older operating systems. It's important to note that the memory stick is not mounted as a standard drive in Windows. MapSource is required for data exchange.
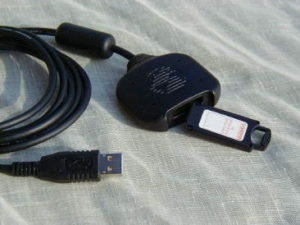
Fig.: Garmin USB Data Card Programmer
The correct installation of the driver for the USB Data Card Programmer is error-prone, since several drivers have to be loaded one after the other in the correct order. The following conditions must be met in order to use the USB Data Card Programmer under MapSource:
- Garmin USB Data Card Programmer (USB 1.0)
- Memory stick 8…256 MB (512 MB are not supported)
- Operating system WinXP with SP3 or WinVista
- DotNet Framework 3.5
- Garmin driver software V2.3.1.2
- MapSource V6.1.6.3
- ActivSync must be disabled in Windows
Table of contents
installation Guide
The installation guide is based on a revised version of this website by Kurt Löffler from Vienna.
Since October 2015 there is the last and therefore current Garmin USB driver with the version 2.3.1.2 and this replaces all previous Garmin USB drivers. This is currently (as of October 2022) still the current Garmin USB driver for the Garmin USB Data Card Programmer.
Step 1
The Garmin USB driver can be downloaded here:
https://www8.garmin.com/support/download_details.jsp?id=591
This USB driver V2.3.1.2 also supports 64-bit operating systems from WinXP and WinVista. But only for Garmin USB GPS devices! The USB Data Card Programmer is not supported by 64 bit operating systems supports!
Download USB driver V2.3.1.2 and save it on the hard disk.
step 2
Garmin USB driver installation
In this step, no Garmin USB device may be connected to the PC! Disconnect all Garmin USB devices before beginning the installation of the Garmin USB driver! Then double-click the .exe file and follow the installation instructions. After successful installation of the Garmin USB driver, be sure to shut down and switch off the PC!
Again very important see above:
First, just double-click the driver.exe file WITHOUT that a Garmin GPS device is connected!
After successful driver installation only step 2 is completed!
step 3
Restart and restart the PC and proceed with step 3 of the Garmin USB driver installation. Only now can the Garmin USB Data Card Programmer be plugged into a free USB port on the PC for the first time! The PC will immediately display the "New Hardware Found" message, and the Device Wizard will open, and step 3 will begin.

Step 2 was installing the Garmin USB driver WITHOUT that a Garmin USB device was plugged in. After plugging in the Garmin USB Data Card Programmer, the hardware wizard will open as shown in the picture above. select option Install software automatically (1.) and with Continue (2.) to the next window.
In the picture, the USB driver previously installed in step 2 is loaded for the Garmin USB Data Card Programmer, which was now connected in step 3.
At the end the window appears that a driver for the Garmin USB Data Card Programmer has been installed. on Complete (1.) click!
!!! And this is where most people start making a mistake!!!
It appears after clicking on top Complete at the bottom of the Windows task bar again the info New hardware found. Please do it! This is not an endless loop but the continuation of the further installation so that it is complete!
This isn't a mistake! The hardware wizard will open again, see the image above, and indicate that "new hardware" has been found! Unfortunately, this is where most people quit, thinking, "I just did that!" And this is a mistake.
Please be sure to run through the whole process again as described in the picture at the top!!!
It is possible that the hardware wizard will report “New Hardware” up to THREE TIMES (!!!)!
That is correct! Sometimes 3 different Garmin drivers have to be loaded! And this happens every time the hardware wizard opens.
Only when the following lights up in the Windows taskbar at the bottom right: “The new hardware has been installed and can now be used” – Only then is the driver installation Completely completed for the Garmin USB Data Card Programmer.
So don't get impatient and pay close attention to what the PC is saying in the bottom right corner! After the third run of the hardware wizard, at the latest, you'll see the message "The new hardware has been installed and is ready to use." Only now is the Garmin USB Data Card Programmer available in the MapSource program, and its installation is now complete and correct!
| An important note, since the question keeps coming up The Garmin USB card reader will Not as “drive” at work! Many people therefore believe that the installation failed, but this is a misconception and incorrect. The Garmin USB card reader only appears in the device manager! "Start" - "Control Panel" - "System" - open the device manager there. It is listed there as a "Garmin Device."  |
On the plus sign GARMIN devices The Garmin USB Data Card Programmer entry will then open, as shown in the red circle above. Left-click on this entry so that it is highlighted in blue, as shown in the image above. Position the mouse pointer over the now blue highlighted entry and right-click. Select "Properties" from the context menu that opens. The window with the Garmin USB Data Card Programmer properties will now open.
In the register tab General, see picture above, the Garmin Data Card Programmer is now shown as ready for use. The USB driver installation was successful. The Garmin USB Data Card Programmer is now ready to use.
step 4
The MapSource program can now be started. Select a map tile with the tool map function (the yellow polygon) and click on a tile. This is now highlighted in pink and the name of the tile appears in the tab on the left cards from MapSource. Now on Send to device click.
The MapSource window opens Send to device, see picture above. Then open the selection window (1.), the list (2.) opens with the possible memory locations on the PC. The entry USB programming device for memory cards (2.) Select, click with the left mouse button so that the entry is marked in blue, as can be seen in the picture above. The Garmin USB Data Card Programmer is now selected and by clicking on the button Send (3.) the transfer of the maps to the Garmin data chip begins.
Annotation:
In the picture above the as Removable disk drive letters L through O marked devices are card readers in the PC for the memory cards of the digital camera - i.e. SD, CF, memory stick, xD card, etc., etc. Here, too, a note to those who allegedly do not transfer any card tiles to the SD/CF cards, etc be able. The new Garmins have normal SD card memory cards. You absolutely have to open the selection window, as shown in the picture above, and select the correct drive letter (card slot of your reader!) from the list in which the respective memory card is inserted, so that MapSource can transfer the map tiles correctly! Often the mistake is made and it becomes a Removable data medium used and up Send clicked without first checking whether the correct card slot of the reader was selected in the list!